
Whilst away on a break, I saw from a Facebook post, that the UK Tesla Shop had started selling a Desktop Supercharger for your phone, I’d seen the 3D printed ones before, but this is the real deal, made using the same CAD drawings as the real ones, with real metal parts.
Tesla Desktop Supercharger – Mobile phone charger
I didn’t need it of course, but who could resist!
I’d recommend if you are going to order one of these, to get a suitable black charging lead to keep it looking as close as possible.
iPhone
USB-A -> Lightning (UNBREAKcable 3ft)
USB-A -> Lightning (Anker 3ft)
USB-C -> Lightning (Mangotek 3.3ft)
USB-C -> Lightning (Anker 3ft)
Android and other USB-C smart phones
USB-A -> USB-C (Rankie 1m)
USB-A -> USB-C (Belkin 4ft)
USB-C -> USB-C (Anker 3ft)
No instructions
Strangely it came with no instructions at all, odd given that you have to take it apart to be able to run your charger cable through it, sadly this means having to watch/skip through a 10 minute YouTube video (10 minutes to make the money!) on how to do it. Or read this blog entry.
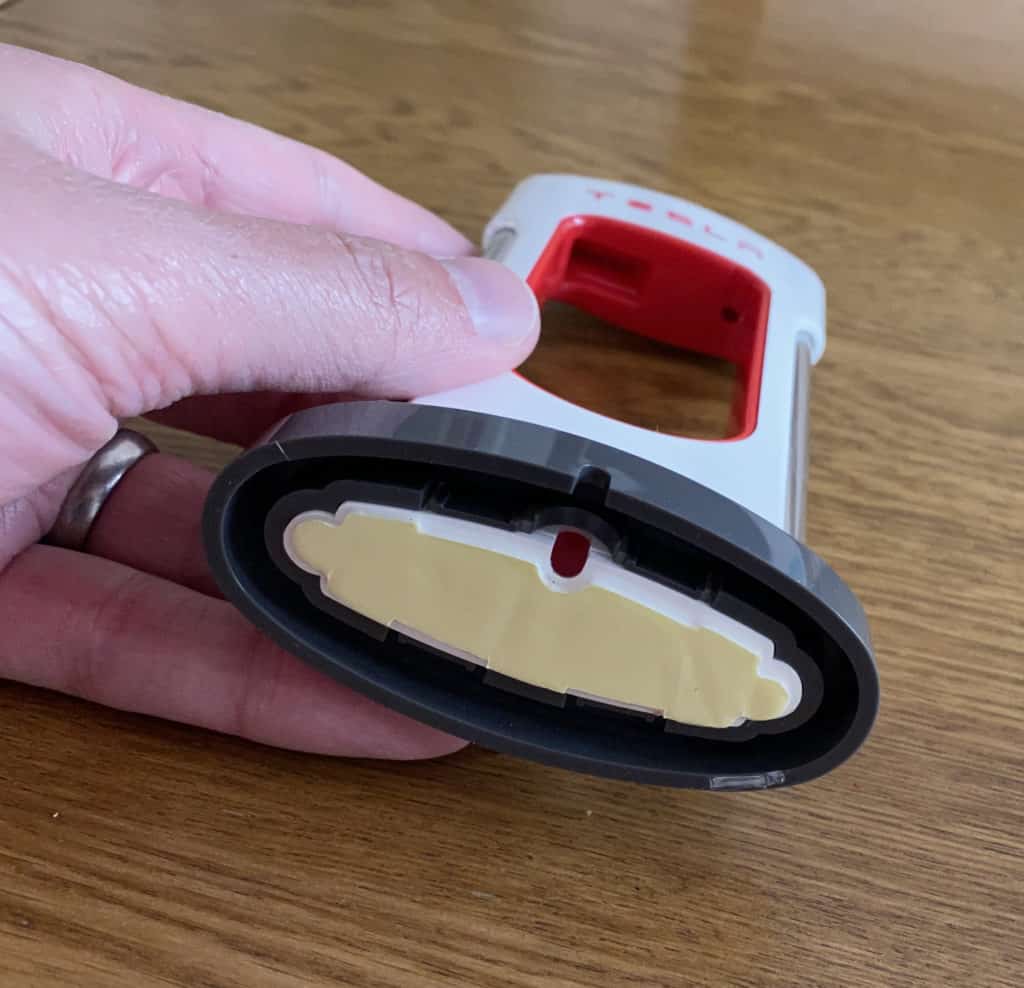
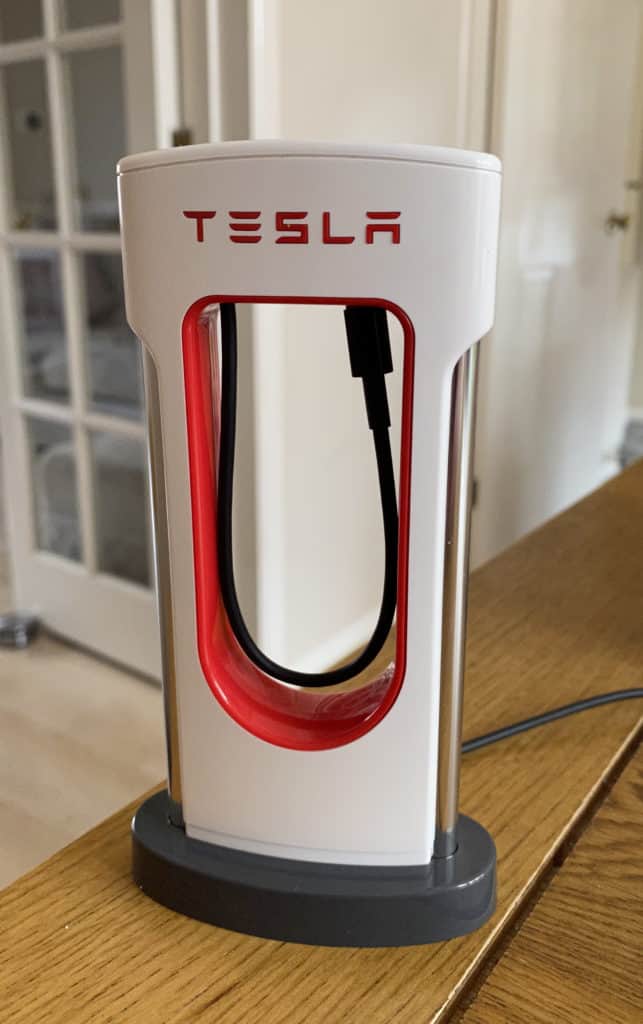
This is how it looks when you first get it out of the box

How to install your charger cable
First thing we need to do is to remove the base of the charger so we can take things apart, turning it on its side gives you this view
There are 4 tabs on here that you need to push back to enable you do release the main charging unit from the base
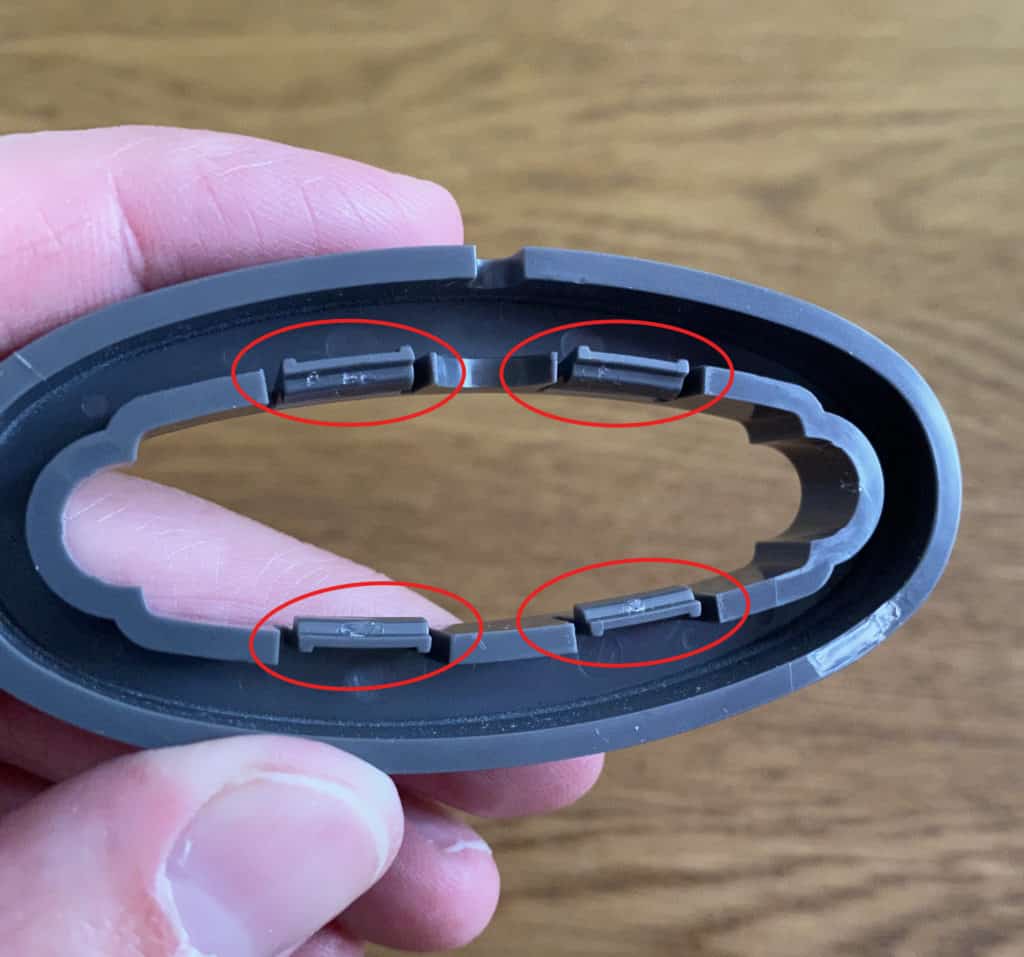
I used a thin bladed screw driver whilst pulling the charging unit upwards.
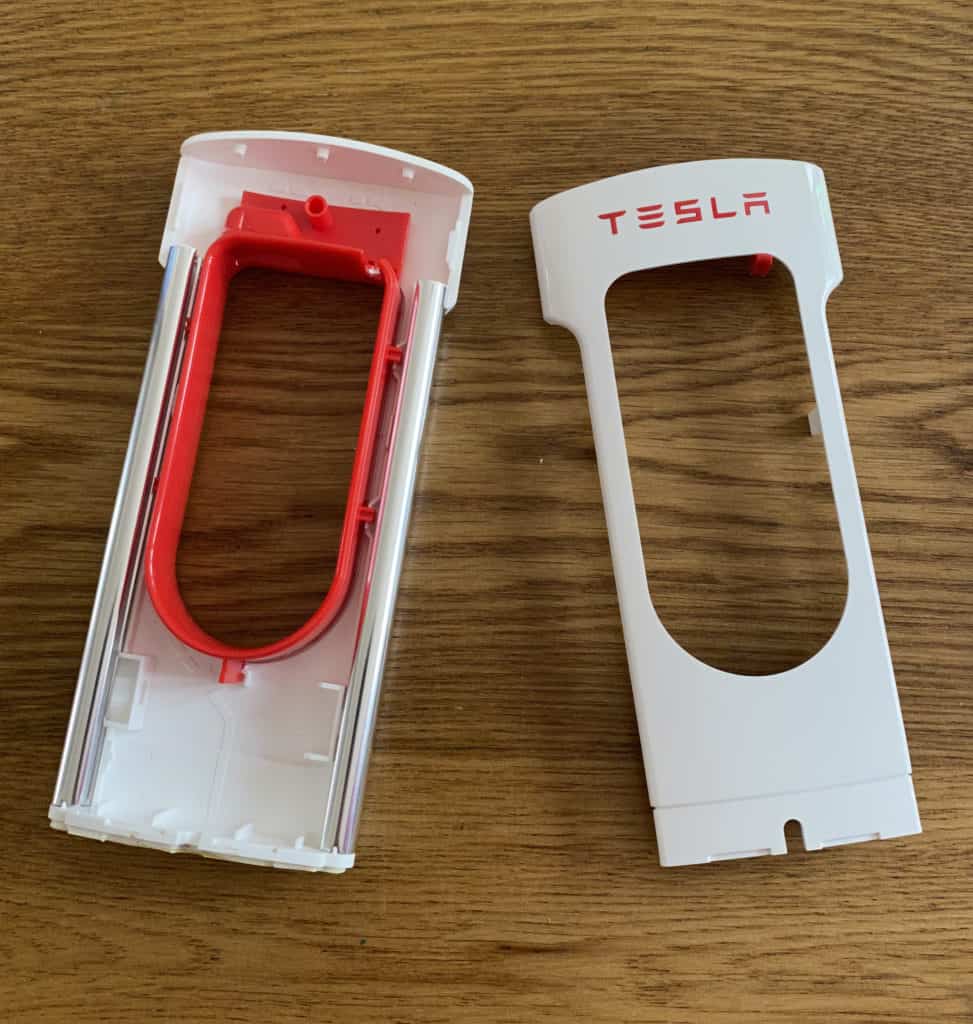
Once you have separated the base and the charger, you now need to separate the two halves, pull them apart at the side, you will then get it to look like this
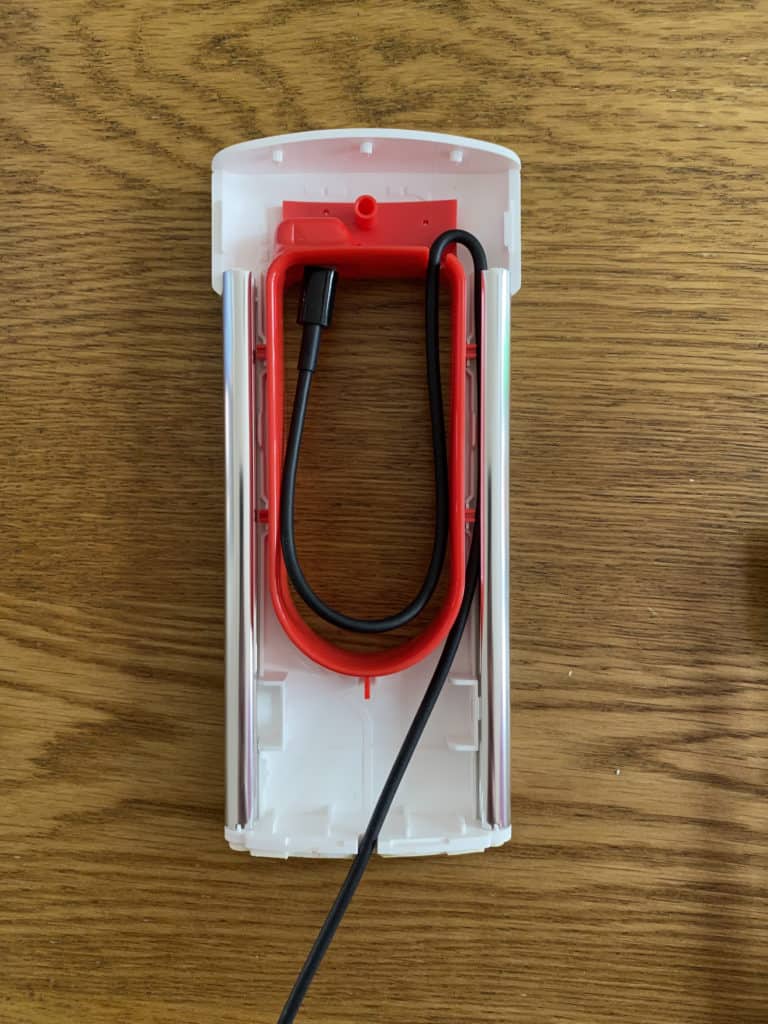
We now need to thread your charging cable through. The below picture shows how it needs to look, but in text form;
Rest the tip of your charger in the recess in the top left, run your charging lead in line with the red insert all the way round and through the hole at the top right of the red insert, then run your charging lead through the metal right hand column, these are removable if it helps, and only fit one way (there is a grove in the bottom). Then run your charging lead through the cap at the bottom of the charger.
It should now look like this:
Now, put the cover back on and reattach the base, you are now done and you can now Supercharge* your phone!
*Actual charging speeds are highly unlikely to be affected by the use of this charger, other than it looking cooler 🙂
Mini review
There’s not too much to say really, you don’t NEED one of these, but the Tesla geek in me couldn’t resist. It’s well made, looks cool and does the job.
There are cheaper 3D printed alternatives, but they won’t look as good as this and they are unlikely to have been made exactly to sale either.
If you like your Tesla gadgets, you know you need one 🙂